
🧰 Expert Gas Ducted Heating Technicians in Clayton South
🔥 Fix2QIK — with David Hiep Pham as lead technician heading a qualified HVAC-R team — carries out gas ducted heating repairs in Clayton South for Braemar, Brivis, Bonaire, Climate Technologies, Omega and Vulcan ducted heating systems, with strongest same-day readiness on Brivis, Braemar and Bonaire.
👉 Clayton South is a residential and light-industrial suburb in Melbourne’s south-east — an area of established post-war and 1970s housing stock alongside commercial and industrial precincts, where gas ducted heating is standard across the residential areas. Braemar systems are well represented in the older Clayton South homes that were heated-upgraded through the 1990s and early 2000s.
We repair all heating problems. Our recent jobs in Clayton South involved Braemar systems that would not start or were displaying an ignition fault.
📞 Same-Day Heating Repairs > Call or SMS on 0420 982 770
✅ Photo: technician on-site fixing a ducted heater
✔️Same-Day Service Available: Call before 12pm (mon-fri)
✔️Upfront, Honest Quotes: Affordable & No hidden fees
✔️Experienced on older & modern models: Written warranty
✔️Solve problems fast: Fully Equipped, OEM Stocked Van
✔️Licensed & Insured Technicians: Compliant Certificates.
✔️Safety Tests: Electrical, combustion checks are not an extra.
* Conditions apply. Final quote provided after diagnosis. No hidden fees.
🛠️ What I Fix (and How I Work)
✅ Over 90% of faults in modern gas ducted heaters built after 2005 are electrical or electronic in origin. Mechanical faults still occur, but a technician who cannot diagnose and repair at the component level — PCBs, control modules, sensors, motor driver circuits, wiring — will misdiagnose the fault or replace whole assemblies unnecessarily.
Fix2QIK is equipped and licensed for component-level diagnostic and repair work, which means a more accurate diagnosis, a more targeted repair, and honest advice about whether a part genuinely needs replacing.
Where a safe and affordable repair is not viable, we can arrange a full system replacement using our licensed plumber and electrician team.
📞Heating Repairs Please Call or SMS on 0420 982 770
👍What to Tell Me When You Call
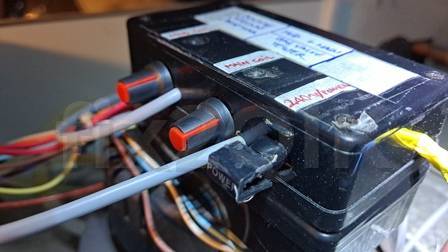
Please have heater’s information ready:
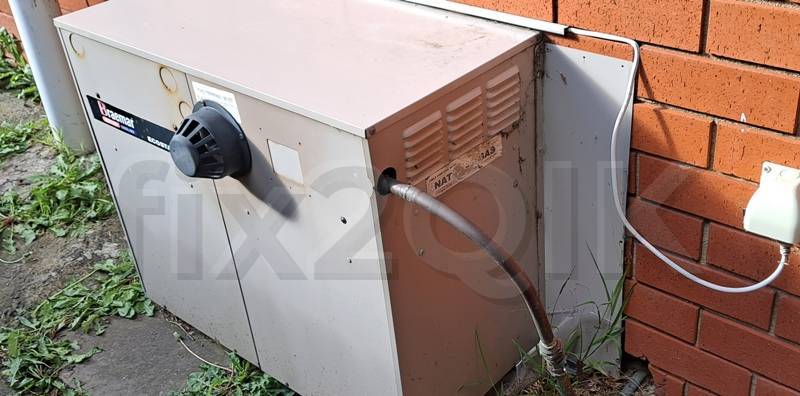
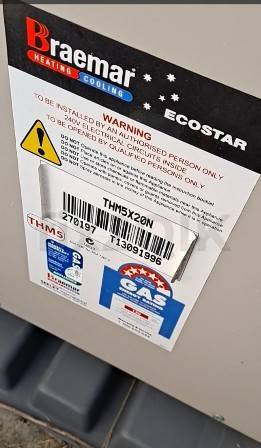
- Heater brand and model — check the label on the front of the unit
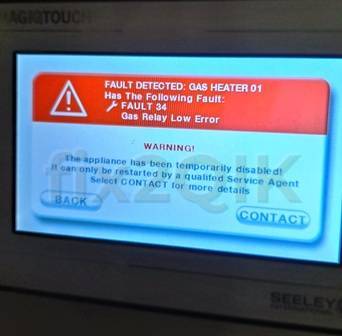
- Error code or fault display — write it down before calling
- Brief description of the fault — what the heater is doing or not doing
- When the fault started and whether it is consistent or intermittent
- Whether anyone else has already looked at or worked on the heater
📞Urgent Clayton South Heating Repairs,
Please Call or SMS on 0420 982 770
🔧 What We Check — Diagnostic Sequence
🛠️ A heating repair call in Clayton South follows a structured diagnostic sequence:
- General operating test — run system, observe fault codes and shutdown pattern
- Visual inspection — unit condition, wiring, combustion area, accessible components
- Electrical safety check — mains supply, earthing, circuit compliance
- Combustion section — burner, igniter, flame sensor, gas valve, pilot
- Fan and motor section — combustion fan speed, room air motor, blade, mount
- Heat exchanger — visual, camera inspection, thermal imaging where indicated, the combustion sensor is also tested using purpose tester.
- Electronic and control section — PCB, control module, sensor wiring, voltage / signal checks
- Controller and thermostat — operation, wiring, zone board, signal integrity
- Overheat safety systems — overheat switch condition, reset, trip temperature.
- CO ambient test — where combustion fault or heat exchanger leaking concern is present
📞Urgent Clayton South Heating Repairs,
Please Call or SMS on 0420 982 770
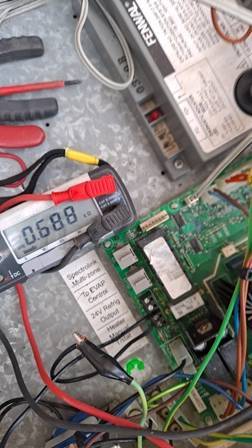
🌞Troubleshooting Hints | Safe Pre-Check Before You Call

📞 Before calling, there are a few safe checks a Clayton South homeowner can carry out on a Braemar system that will not start or is displaying an ignition fault:
- Record the exact fault code — write down the alphanumeric code displayed on your Braemar controller or thermostat before doing anything else. This code directly indicates which stage of the ignition sequence failed.
- Check the thermostat settings — confirm the thermostat is in heating mode, the target temperature is set above the current room temperature, and the fan is not set to fan-only. A Braemar will not attempt ignition if the thermostat is not actively calling for heat.
- Replace thermostat batteries — a low battery in a Braemar controller or zone thermostat can prevent the start signal from reaching the unit. Replace with fresh batteries before calling.
- Check the circuit breaker — confirm the heater circuit breaker is on and the unit has mains power. An ignition fault that appears immediately on powering up can indicate a supply issue rather than an ignition component fault.
- Attempt one reset only — follow the reset procedure in your Braemar owner’s manual for your model. Attempt one reset. If the heater starts and completes a full heating cycle, monitor for recurrence. If the fault code returns within a few cycles, stop and call.
- Check gas supply at other appliances — confirm your cooktop or hot water service is working normally. A gas supply interruption affects all appliances, not just the heater.
If a gas smell is present at any point — >do not reset, do not operate any switches. Leave the property and call the gas emergency line.
📞Urgent Clayton South Heating Repairs,
-> Please Call or SMS on 0420 982 770
🧰 Specialist Fault Focus — Braemar Won’t Start and Ignition Fault Diagnosis
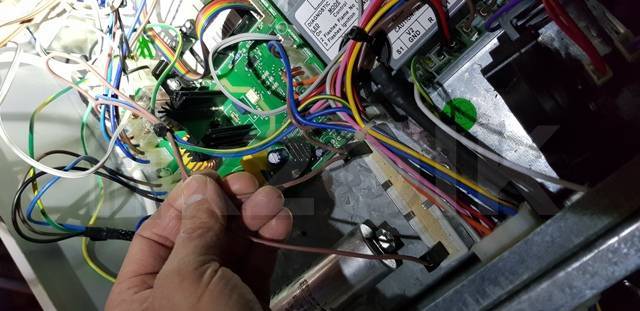
I do not treat a Braemar ignition fault as a part-swap job starting with the most expensive component
When a Braemar won’t start and displays an ignition fault code, I cross-reference the code against the service documentation for that specific model to identify which stage of the ignition sequence failed before any component is accessed. Braemar fault codes for ignition failures are model-specific and can point to the ignition board, the igniter, the flame sensor, or the gas valve circuit — each requiring a different diagnostic approach and a different repair.
The ignition sequence is tested step by step under operating conditions: the igniter is resistance-tested and spark output checked for correct energy and timing; the flame sensor is tested for correct signal output once the burner is alight and checked for carbon deposits that degrade signal quality; the gas valve is tested for correct opening timing and full gas flow during the ignition window. Wiring is checked end-to-end — continuity, correct termination, and insulation integrity on all ignition circuit conductors. In older Clayton South homes with Braemar systems installed twenty or more years ago, ignition circuit wiring degradation and connector corrosion are a realistic fault source that produces a persistent ignition fault code but is resolved by a wiring repair rather than a component replacement.
📞 Written Warranty on All Repair Work. Please Call or SMS on 0420 982 770
🤝Our Qualifications & Your Peace of Mind
- Registered business – ABN: 40010599400.
- Trading since 2001. Fully Insured
- Fix2QIK is a team of licenced professionals:
- L084241 (RAC01 _ Refrigeration Mechanic)
- D15929 (Class 1 _ Fault Finding Electrician)
- A24341 (Advanced Electronic Technician)
- 115197 (VBA Plumbing Contractors)
- 110960 (VBA Plumbing Subcontractor)
- And other formally recognised qualifications in the HVAC-R Industry.
- We issue relevant compliant certificates.
- All subcontractors directly involved in your job are appropriately insured.
- Clear Quote, Affordable, Quick Repairs, Honest advice.
📞 Repair Enquiry. Please Call or SMS on 0420 982 770
🧰 Repair First — Replace Only If Evidence Supports It
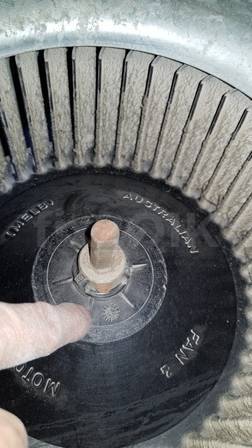
A heater showing a fault code or shutting down unexpectedly does not automatically need to be replaced. The right process is:
- Diagnose the fault properly — not a surface check
- Identify the failed component or system
- Assess whether repair is technically and economically sound
- Advise clearly and honestly before any repair work proceeds
- CO test where combustion fault or heat exchanger concern is present
- CO detector battery check and replacement where relevant
We only recommend replacement after a thorough inspection and testing confirm that the system is unsafe, too costly to repair, or has reached the end of its usable life. Our call-out fee covers the diagnostic process, detailed measurements, a transparent report, and an initial effort to restore the system to a safe, working condition.
📞 Written Warranty on All Repair Work. Please Call or SMS on 0420 982 770
Heating Repairs in Clayton South and Nearby Areas
For Clayton South, the featured specialist repair angle is Braemar won’t-start and ignition fault diagnosis — testing the full ignition sequence, gas valve operation, and wiring integrity at component level to identify the specific cause of startup failure rather than starting with part replacement.
📍
Nearby Service Coverage
Repair area-coverage includes:
- Springvale
- Springvale South
- Clarinda
- Clayton
- Dingley Village
- Keysborough
- Noble Park
- Oakleigh South
- Dandenong
- Noble Park
📞 Clayton South Heating Repairs: Call or SMS Fix2QIK on 0420 982 770
Please call before 12pm (mon – fri) to check our working run today early for the quick same day heating repairs in Clayton South and the nearby listed suburbs.
💬 Frequently Asked Questions
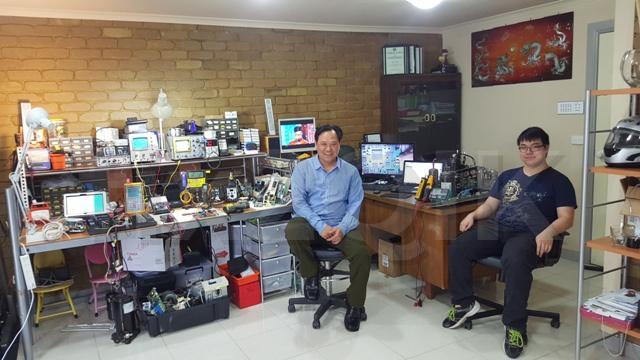
Q: What does the call-out fee cover for heating repairs in Clayton South?
A: The call-out fee covers travel to your Clayton South property, a structured diagnostic assessment, testing the fault, and an honest report. In many cases a minor adjustment or small part can be replaced on the same visit. Where parts are required, a clear quote is provided before any further work proceeds. As professionals We are provide upmost care and prioritised of your budget and safety on the repairs.
Q: Can you do same-day heating repairs in Clayton South
A: Same-day attendance is available for Clayton South. Call or SMS early: 0420 982 770 , to secure a same-day booking. Priority is given to calls with no heat in the home.
Q: My Braemar heater won’t start and is showing a fault code — what does that mean?
A: A Braemar ignition fault code means the heater’s control system detected a failure at a specific stage of the ignition sequence — it stopped as a safety measure rather than continuing with an unconfirmed fault. The code indicates which stage failed: whether the igniter did not produce a spark, the flame sensor did not detect a flame, the gas valve did not open correctly, or the ignition board timed out. Write the code down before calling — it is the first thing I will ask for and it determines where the diagnostic sequence starts.
Write down the exact code before calling — it is the first thing I will ask for.
Q: How do you diagnose a Braemar ignition fault — do you start by replacing the igniter?
A: No. The fault code is cross-referenced against Braemar service documentation for the specific model first, which identifies the circuit implicated. The ignition sequence is then tested step by step: igniter resistance and spark output, flame sensor signal output and contamination, gas valve opening timing and flow, ignition circuit wiring continuity and termination. Each component either passes or fails a measurable test — the faulty component is identified before anything is replaced.
Q: My Braemar heater is old — is it worth repairing?
A: Age alone is not a sufficient reason to replace a gas ducted heater. The relevant questions are: what is the fault, what does it cost to repair correctly, and what is the honest remaining serviceable life of the unit after repair? Fix2QIK provides a clear, component-level assessment and honest advice before any repair work proceeds. Replacement is only recommended when inspection and testing clearly support it.
Q: Do you use genuine Braemar parts and provide a warranty?
A: Yes. Genuine OEM parts are used wherever available. All repair work carries a written warranty. Clear quote before work proceeds — no hidden fees
Q: Can I get an online estimate for heating repairs in Clayton South?
A: We provide an indicative price range based on typical repair work. For an accurate quote, we need to diagnose your specific fault — brand, model, component failure, and parts availability all affect the final cost. Call or SMS 0420 982 770 no obligation, no hidden fees.
Q: Payment Methods?
A: We use Westpac EFTPOS terminals on-site — no risky apps, no unsecured links, no record kept. Your data stays safe with you. Alternatively, you could pay with PayID.
Heating Repairs Booking before 12pm (mon-fri) is often get same-day repair!
Gas Ducted Heating Repairs Clayton South,
Fix2QIK: Heating Repairs | Clayton South Melbourne – Australia.
Call or SMS:0420 982 770.
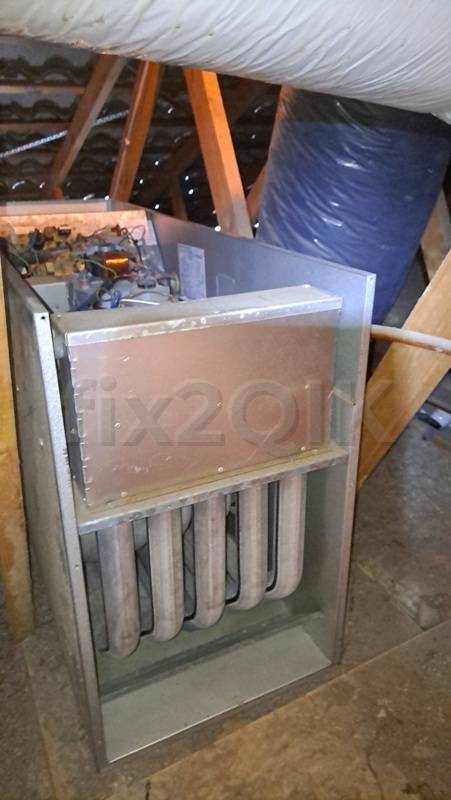
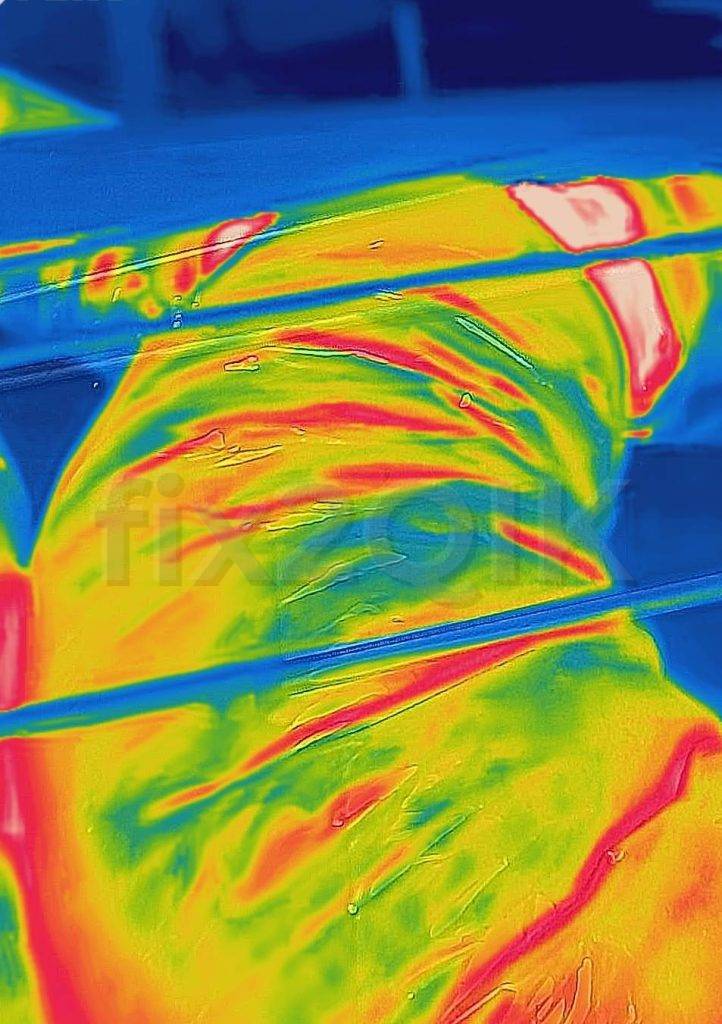
For Clayton South homeowners, Fix2QIK offers component-level repair capability on Braemar ducted heating systems — including won’t-start and ignition fault diagnosis, ignition sequence step-by-step testing, gas valve operation, and ignition wiring continuity checks — covering the full fault path rather than guessing at components. The same repair capability applies across Brivis, Bonaire, Climate Technologies, Omega and Vulcan systems.
Braemar Fault Codes Homeowners Often See Before Calling
If your Braemar ducted heater is showing a fault code, write the code down before resetting the unit. The code helps identify which stage of the heater’s start-up, ignition, airflow, flame-sensing, or safety sequence has failed. The list below gives a simple homeowner-level explanation only — the actual cause still needs to be tested on the heater.
Braemar Ducted Heating Fault Codes & Quick Diagnostic Guide
Braemar ducted heaters can display fault codes when the heater control board detects an unsafe, abnormal, or failed start/run condition. The guide below gives a simple explanation of common Braemar ducted heating fault codes. It is designed to help homeowners understand what the code may relate to before booking a proper service or diagnostic repair.
Important: Fault codes are only a starting point. The same code can be caused by airflow problems, pressure switch faults, ignition issues, wiring faults, sensor problems, blocked drains, fan faults, gas valve issues, or control board faults. A licensed technician should test the heater before parts are replaced.
Error Code 01 — Low pressure switch closed at start
Diagnostic: The low pressure switch appears closed before the combustion fan starts.
Simple explanation: The heater is seeing an air-pressure signal too early. This may point to a pressure switch, hose, wiring, or control-board sensing issue.
Error Code 02 — Low pressure switch failed to close
Diagnostic: The low pressure switch did not close after the combustion fan was powered.
Simple explanation: The heater may not be proving correct combustion airflow. Causes can include fan, flue, hose, pressure switch, or airflow-related faults.
Error Code 03 — Low pressure switch opened during run
Diagnostic: The low pressure switch opened while the heater was running.
Simple explanation: The heater lost its expected combustion airflow signal during operation. This can be intermittent and should be tested under real running conditions.
Error Code 04 — Thermistor above 70°C during run
Diagnostic: The heater detected excessive thermistor temperature during operation.
Simple explanation: This often relates to overheating, restricted airflow, fan speed, duct issues, filter blockage, or sensor reading problems.
Error Code 05 — Thermistor short or open circuit
Diagnostic: The thermistor is reading outside its expected range.
Simple explanation: The temperature sensor or its wiring may be open, shorted, disconnected, or giving an invalid reading to the control board.
Error Code 06 — Flame detected when not required
Diagnostic: The heater detected a flame signal when flame should not be present.
Simple explanation: This may involve flame sensing, ignition control, gas valve, earthing, wiring, or control board faults. This fault should not be ignored.
Error Code 07 — Ignition failure
Diagnostic: The heater failed to detect flame within the required ignition period.
Simple explanation: Common causes include gas supply, ignition spark, flame sensor, burner, gas valve, or control board issues. Proper testing avoids unnecessary part replacement.
Error Code 08 — Condensate pressure switch closed at start
Diagnostic: The condensate pressure switch appears closed before startup.
Simple explanation: The heater may be detecting a condensate or pressure condition too early. Drain, switch, hose, wiring, and board input should be checked.
Error Code 09 — Thermistor above 60°C during start
Diagnostic: The thermistor temperature was too high during the start cycle.
Simple explanation: The heater may still be hot, airflow may be restricted, or the sensor may be giving an abnormal reading during startup.
Error Code 10 — HX OT1 open
Diagnostic: The first heat exchanger over-temperature circuit has opened.
Simple explanation: The heater has detected an overheat protection condition. Airflow, filters, fan operation, ducts, and over-temperature safety circuits need checking.
Error Code 11 — Loss of flame signal
Diagnostic: The heater lost the flame signal while running.
Simple explanation: The burner may have dropped out, or the flame sensor circuit may not be reading correctly. Gas, flame sensing, earthing, and board inputs may be involved.
Error Code 12 — High pressure switch closed at start
Diagnostic: The high pressure switch appears closed during startup before expected.
Simple explanation: The heater is detecting a pressure signal at the wrong time. The pressure switch, hoses, wiring, or control board input may require testing.
Error Code 13 — High pressure switch failed to close
Diagnostic: The high pressure switch failed to close within the set time.
Simple explanation: The heater may not be proving correct combustion pressure. This may involve flue restriction, fan performance, pressure sensing, or switch failure.
Error Code 14 — High pressure switch opened during run
Diagnostic: The high pressure switch opened while the heater was running.
Simple explanation: The heater lost a required pressure signal during operation. Intermittent pressure faults often need live testing while the unit is running.
Error Code 15 — Thermistor in cool duct location
Diagnostic: Multiple over-temperature resets suggest the thermistor is not correctly helping the heater increase fan speed.
Simple explanation: This can happen when the sensor location, airflow pattern, fan response, or temperature feedback does not match what the heater expects.
Error Code 16 — Thermistor in cool duct location
Diagnostic: Multiple over-temperature resets suggest poor thermistor temperature feedback.
Simple explanation: The heater may be overheating while the thermistor is not sensing the correct temperature rise. Airflow and sensor placement should be checked.
Error Code 17 — Condensate detected during run
Diagnostic: The condensate pressure switch condition was detected while running.
Simple explanation: The heater may have condensate drainage, pressure switch, hose, or drain-pan related issues that need inspection.
Error Code 18 — Condensate detected during start
Diagnostic: Condensate was detected in the heat exchanger drain pan during startup.
Simple explanation: The heater may have a blocked drain, trapped condensate, switch fault, hose issue, or installation-related drainage problem.
Error Code 19 — HX OT2 open
Diagnostic: The secondary over-temperature circuit has opened.
Simple explanation: This is a serious overheat protection fault. The heater may shut the gas valve and run the fan at high speed to protect the system.
Error Code 20 — Flame rollout detected during start
Diagnostic: A flame rollout condition was detected during startup.
Simple explanation: Flame rollout is a safety-related condition. The heater should be checked by a qualified technician before further use.
Error Code 21 — Flame rollout detected during run
Diagnostic: A flame rollout condition was detected while the heater was running.
Simple explanation: This may indicate combustion, burner, heat exchanger, flue, or airflow problems. The heater should not simply be reset repeatedly.
Error Code 22 — Supply voltage out of range
Diagnostic: The supply voltage or transformer voltage is outside acceptable limits.
Simple explanation: The heater may have a power supply, transformer, wiring, connection, or board voltage issue.
Error Code 23 — Room fan not running
Diagnostic: The room fan did not reach expected speed shortly after starting.
Simple explanation: The indoor fan, motor, capacitor, speed sensor, wiring, or control output may be faulty.
Error Code 24 — Room fan running backwards
Diagnostic: The motor speed sensor detected reverse fan rotation.
Simple explanation: This may relate to motor direction, sensor feedback, wiring, control board output, or motor assembly issues.
Error Codes 25–29 — Data table flag incorrect
Diagnostic: The heater has detected an error in its internal data tables.
Simple explanation: This points more toward configuration, control board, memory, or model-data mismatch rather than a simple airflow or ignition fault.
Error Code 30 — Loom ID incorrect
Diagnostic: The wiring loom does not match the heater model.
Simple explanation: The heater may have an incorrect loom, wrong replacement part, wiring mismatch, or model identification issue.
Error Code 31 — Combustion air pressure detected before start
Diagnostic: The pressure sensor detected combustion air pressure before startup.
Simple explanation: The heater is reading pressure when it should not. This can involve sensor calibration, tubing, fan pressure, wiring, or board logic.
Error Code 32 — Combustion air pressure too low at start
Diagnostic: The combustion air sensor did not sense enough pressure during startup.
Simple explanation: This may involve the combustion fan, flue restriction, air pressure sensor, tubing, blocked intake, or heater setup.
Error Code 33 — Gas relay high error
Diagnostic: The control board detected an error with the high gas relay.
Simple explanation: This fault may involve the gas valve control circuit, relay operation, wiring, or the internal control board.
Error Code 34 — Gas relay low error
Diagnostic: The control board detected an error with the low gas relay.
Simple explanation: The heater may have a gas valve relay, control board, wiring, or valve control issue.
Error Code 35 — Flame rollout circuit check failed
Diagnostic: The flame rollout circuit failed its safety check.
Simple explanation: The flame rollout safety circuit, wiring, sensor, or board input may not be proving safe operation.
Fault Code 36 — Flame rollout loom disconnected or shorted
Diagnostic: The flame rollout circuit appears disconnected or shorted to ground.
Simple explanation: This may be a wiring loom, connector, rollout sensor, or board input fault. It should be checked before the heater is operated again.
Error Code 37 — Reset button stuck
Diagnostic: The reset button appears stuck closed or jammed down.
Simple explanation: The control may be reading a permanent reset signal. The button, wiring, or control board input may need inspection.
Fault Code 38 — Gas valve closed during run
Diagnostic: One or both gas valve relays opened unexpectedly while running.
Simple explanation: This can cause flame loss or shutdown. Gas valve control, relays, wiring, and board output should be tested.
Error Code 39 — Combustion air pressure sensor error
Diagnostic: The control board detected an error with the air pressure sensor.
Simple explanation: The air pressure sensor, tubing, wiring, connection, or control board input may be faulty.
Error Code 45 — Combustion air pressure too low during run
Diagnostic: The pressure sensor lost required pressure during operation.
Simple explanation: This may be caused by flue issues, combustion fan problems, blocked intake, sensor problems, or intermittent pressure loss.
Error Code 46 — Gas valve modulating coil outside range
Diagnostic: The gas valve modulating coil is outside its allowed electrical range.
Simple explanation: The modulating gas valve coil, wiring, connector, or control board output may require testing.
Error Code 47 — Combustion pressure sensor communication error
Diagnostic: The control board detected a communication error with the air pressure sensor.
Simple explanation: This may involve the sensor, plug connection, wiring loom, board communication circuit, or moisture/corrosion at the connector.
Error Code 48 — Micro flame mismatch
Diagnostic: The heater detected a mismatch between microprocessor flame readings.
Simple explanation: This is more likely an internal control, flame sensing, or board-level diagnostic issue than a simple homeowner reset problem.
Error Code 49 — Five lockouts within 15 minutes
Diagnostic: The heater has locked out five times within a 15-minute period.
Simple explanation: Repeated resets are not fixing the cause. The heater is repeatedly failing a safety or running condition and should be diagnosed properly.
Fault Code 50 — MagIQtouch controller communication loss
Diagnostic: The heater lost communication with the MagIQtouch controller.
Simple explanation: This may involve the controller, data cable, plug, communication wiring, power supply, or heater control board.
Error Code 51 — Micro 2 error found
Diagnostic: The second microprocessor has reported an error.
Simple explanation: This points toward an internal control-board or processor-check fault and usually requires technician-level diagnosis.
Error Code 52 — System check memory error
Diagnostic: The heater detected an error while checking system memory.
Simple explanation: This may indicate a control board memory, firmware, configuration, or internal electronics issue.
Error Code 53 — Voltage rail error
Diagnostic: The control board detected an error on the voltage rail.
Simple explanation: This may involve power supply stability, transformer output, internal board voltage regulation, wiring, or electronics faults.
Error Codes 54–64 — Internal ICS fault
Diagnostic: The integrated control system has detected an internal error.
Simple explanation: These codes usually point toward control-board level diagnostics rather than simple filter or thermostat problems.
Error Code 70 — Flame sense reading high at startup
Diagnostic: Microprocessor one detected flame sense above threshold at startup.
Simple explanation: The heater may be reading an abnormal flame signal before normal ignition. Flame sensing, earthing, wiring, moisture, or board faults may be involved.
Error Code 71 — Flame sense reading high at startup
Diagnostic: Microprocessor one detected a second abnormal flame sense reading at startup.
Simple explanation: This may involve false flame detection, flame circuit noise, poor earthing, wiring faults, or control-board sensing problems.
Error Code 72 — ICS flame circuit error, Micro 2
Diagnostic: The second microprocessor detected a flame circuit error on startup.
Simple explanation: This is likely related to flame detection electronics, board-level sensing, wiring, or safety circuit checking.
Error Code 73 — Ripple value too high at startup
Diagnostic: The flame sense circuit detected a high ripple value at startup.
Simple explanation: Electrical noise, poor earthing, moisture, flame sensing circuit problems, or control-board faults may trigger this type of code.
Error Code 74 — Flame sense reading high after pre-purge
Diagnostic: Microprocessor one detected flame sense above threshold after pre-purge.
Simple explanation: The heater is seeing a flame-related signal when it should be proving a safe pre-ignition condition.
Error Code 75 — Flame sense reading high after pre-purge
Diagnostic: Microprocessor one detected another abnormal flame reading after pre-purge.
Simple explanation: This may be linked to flame sensing, wiring, grounding, moisture, or internal control-board signal checking.
Error Code 76 — ICS flame circuit error after pre-purge
Diagnostic: The second microprocessor detected a flame circuit error after pre-purge.
Simple explanation: This fault relates to the heater’s flame safety circuit and should be tested before repeated reset attempts.
Error Code 77 — Ripple value too high after pre-purge
Diagnostic: The heater detected a high ripple value in the flame sense circuit after pre-purge.
Simple explanation: Possible causes include flame circuit noise, earthing problems, wiring issues, moisture, or control-board electronics faults.
Fault Code 78 — Flame sense reading high during startup
Diagnostic: Microprocessor one detected flame sense above threshold during startup.
Simple explanation: The heater is receiving an unexpected flame signal during the start sequence. This requires proper flame-sensing and board-level checks.
Need help with a Braemar ducted heater fault code? A fault code can tell you where the heater stopped, but not always why it stopped. For accurate Braemar ducted heating diagnosis, the heater should be tested under startup, ignition, airflow, combustion, and running conditions.
Seeing one of these Braemar fault codes in Clayton South? Call or SMS Fix2QIK on 0420 982 770. A fault code tells us where the heater stopped; proper testing tells us why it stopped.
- *T&C apply- please enquiry.
- Fix2QIK services are designed to deal directly with property owners and registered landlords only. If you are making an enquiry, you must be authorised to represent such owners.
- Disclaimer:
Brand names and trademarks belong to their respective owners, and being used here for descriptive purposes only.
For any further information or clarification on our terms and conditions, please contact us.